ChatGPT
 Gemini
 Perplexity
 Claude
 Grok
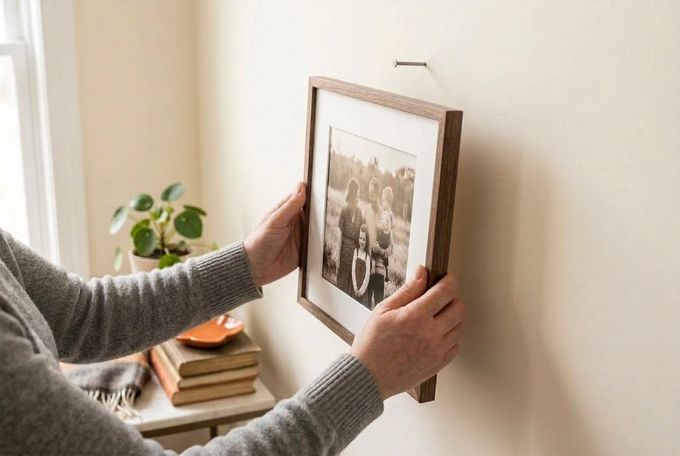
That small zigzag hanger on the back of a frame does more work than it gets credit for. It holds photos, prints, and mirrors flat with a single nail or screw, instead of a wire loop that sags or twists. Hanging a picture with sawtooth hangers is straightforward once you know what to check first.
Maybe you've got new frames waiting to go up, or you're rehanging something that's leaned against the wall for months. Either way, it comes down to three things: the frame's weight, the wall behind it, and whether you need one hanger or two.
This guide explains how to hang pictures with sawtooth hangers from start to finish, plus mistakes to avoid and a few time-saving tricks.
What Is a Sawtooth Hanger?
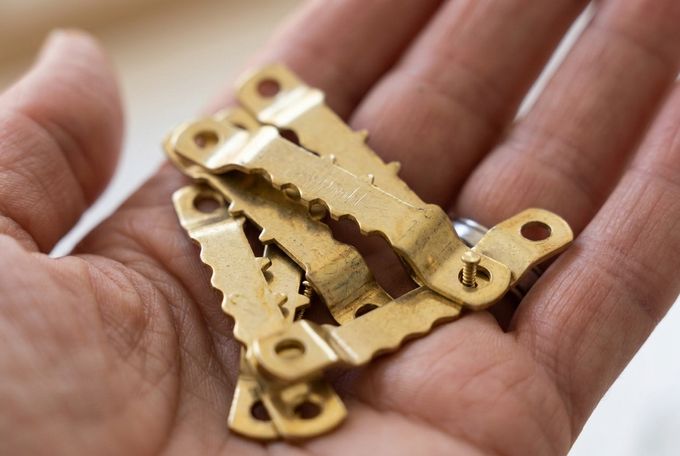
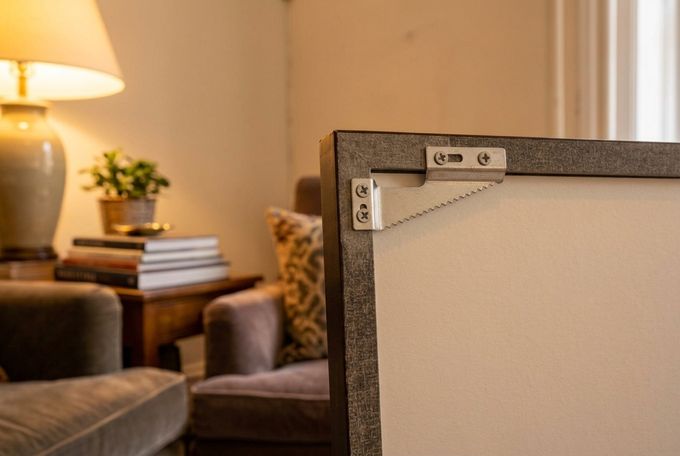
A sawtooth picture hanger is a small strip of brass or steel, with a row of angled teeth cut along one edge, that screws or nails to the back of a frame just below the top edge. It's the quiet workhorse behind most framed photos, prints, and mirrors, doing the job with a single nail or screw instead of a wire loop.
How Do Sawtooth Hangers Work?
The frame slides onto a wall-mounted nail or screw, and the row of angled teeth does the rest. Several teeth line up with the fastener at once, but only one needs to catch, wedging tighter as gravity pulls the frame down rather than slipping loose.
That grip is why framers reach for sawtooth picture hangers over wire loops so often. Wire can sag over time, twist the frame off level, or leave a visible bulge behind lighter moldings. A sawtooth hanger sits flush against the wall, keeps the back of the frame tidy, and doesn't shift once it's caught.
How Much Weight Can a Sawtooth Hanger Hold?
How much weight a sawtooth hanger can hold depends on the type and size of the hanger. Small, standard hangers, which are commonly found on inexpensive frames, are typically rated for around 20 lbs (9 kg) [1]. For a little extra peace of mind, it’s best to keep the frame closer to 11 lbs (5 kg) when using a standard hanger.
If you’re hanging a heavier frame, a solid steel sawtooth hanger can handle around 24 lbs (11 kg). Heavy-duty sawtooth hangers designed for wide or substantial moldings can support considerably more, with some rated for up to 250 lbs (113 kg) [2].
Here's a summary of how these ratings stack up against each other:
Hanger type | Typical weight rating | Best suited to |
|---|---|---|
Standard brass or steel sawtooth | Up to ~20 lbs (9 kg) | Most standard framed photos and prints, including larger sizes with a mat and acrylic overlay |
Solid steel sawtooth | Up to ~24 lbs (11 kg) | Larger or heavier frames, and framed canvases with extra depth |
Heavy-duty sawtooth (wide moldings) | Up to ~250 lbs (113 kg) | Oversized pieces on wide moldings, well beyond typical home decor sizes |
Ratings vary by manufacturer. Check the specific hanger's packaging before hanging anything heavier than a small print.
For example, a 16 x 20 frame usually lands around 4 to 6 lbs, and a larger 24 x 36 frame around 12 to 15 lbs. Both fit under a standard sawtooth's rating, but the larger one is worth bumping up to a solid steel version instead.
What About Sawtooth Hangers for Canvas?
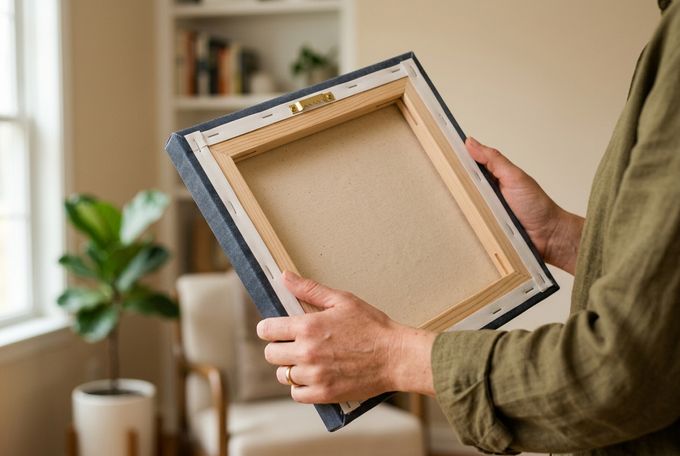
Canvas changes the math too, since a framed canvas skips the mat entirely. A wrapped canvas goes further and drops the outer frame as well, so a piece that size often weighs less than the same image behind glass. That's one reason sawtooth hangers for canvas can handle pieces that would need heavier hardware as a framed photo.
If you're weighing the two formats, it helps to know how framed and wrapped canvases differ in construction and weight.
Which Walls Work Best for Sawtooth Hangers?
A sawtooth hanger is only as strong as the wall and fastener behind it, so it helps to know what's actually behind the paint before you drill.
- Solid walls: Plaster over masonry, brick, or block holds a single nail or screw on its own; no anchor needed.
- Stud walls or standard drywall: Aim for a stud whenever the placement allows it. If the spot falls between studs, use a wall anchor rated for the frame's weight, since drywall alone won't support much on its own [1].
- Brick or concrete: Use a masonry screw or anchor with a thin masonry drill bit, since a standard bit won't cut cleanly into either material.
Toggle-style anchors generally hold more than basic plastic ones, so match the anchor to the frame the same way you'd match the hanger.
Preventing Plaster Cracks
Plaster is more brittle than drywall and prone to small cracks radiating out from a fresh nail hole. Cover the exact spot with a strip of masking or decorator's tape before you drill or hammer, then pre-drill a small pilot hole through it. The tape keeps the surrounding plaster from chipping as the fastener goes in.
How to Hang Pictures With a Sawtooth Hanger
Once you know the frame's weight and the wall you're working with, the process comes down to four steps.
Step 1: Plan the Placement and Mark the Top Center
Before anything touches the wall, take a minute to decide where the piece should go. Consider the room's natural and artificial light, how the piece relates to nearby furniture or other art, and the feeling you're going for. If the spot gets a lot of direct sun, it helps to know how to protect a canvas print from fading before you settle on that wall.
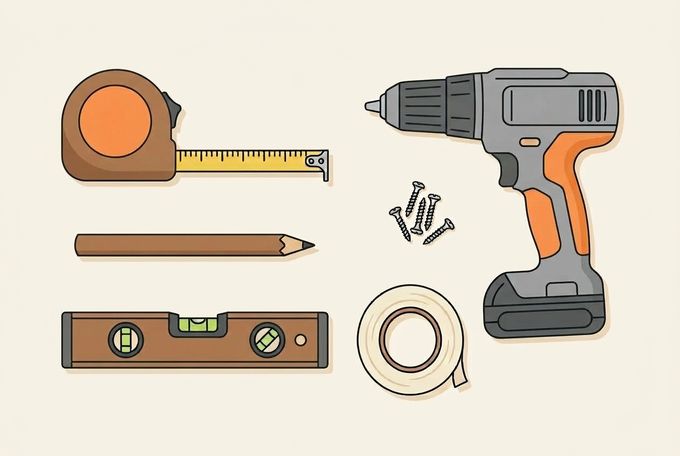
Then, gather the necessary tools:
- Hammer or drill (depending on your fastener)
- Nails or screws (or anchors)
- Spirit level
- Tape measure
- Pencil
- Decorator's tape
Ideally, have a second person hold the frame in place while you make a light pencil mark at the top center of where you want it to sit.
Step 2: Measure and Transfer the Drop
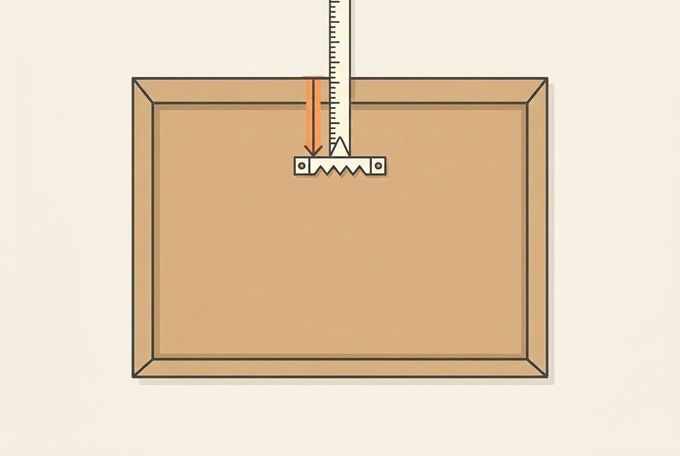
Flip the frame over, then measure from its top edge down to the lowest point of the sawtooth hanger's center tooth (the one the frame will actually rest on). That measurement is the drop.
Go back to your pencil mark on the wall and measure straight down by that same distance, then make a second, small mark. That mark is exactly where the fastener needs to go, since it accounts for the gap between the top of the frame and the hanger itself.
Step 3: Choose and Drive the Right Nail or Screw
What nails to use for sawtooth hangers depends mostly on the wall. A headed nail sized for the hanger works well on a solid wall, while a stud calls for a pre-drilled pilot hole and a wood screw for a hold that lasts. On masonry, use a masonry screw or anchor with a thin masonry bit.
Step 4: Hang, Nudge, and Level
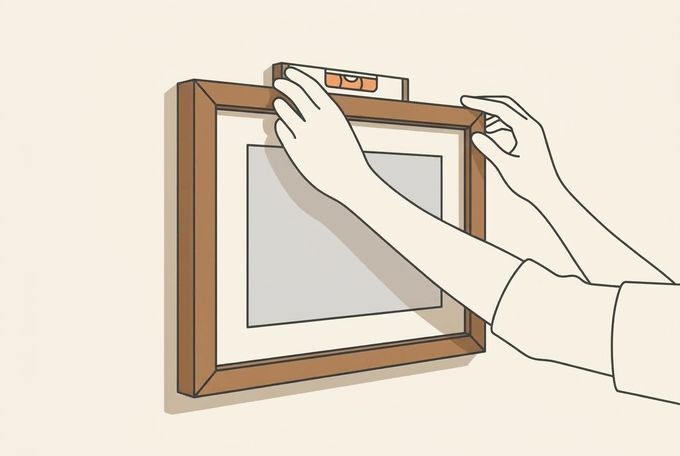
With the fastener in place, lift the frame and hook the sawtooth hanger's middle tooth over it. Gently nudge the frame left or right until it looks straight, then check it with a spirit level rather than trusting your eye, since most rooms have at least a slight lean somewhere.
How to Hang a Picture With Two Sawtooth Hangers
Wider or heavier frames often need two sawtooth hangers instead of one, positioned near each corner to balance the weight.
Alignment is the real challenge, since a small mismatch between the two nail positions tilts the whole piece.
Here's how to line them up without any math:
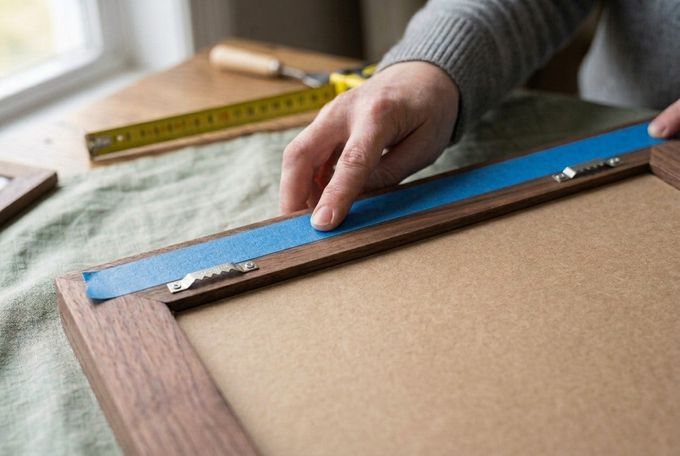
- Tape across both hangers: Run a strip of decorator's tape along the back of the frame, over the top edge and across both sawtooth hangers.
- Mark each hanger's tooth: Press through the tape to mark the center tooth position of each hanger.
- Transfer the tape to the wall: Peel off the tape and stick it onto the wall at the height and level position you've already planned.
- Drill and drive through the marks: Fasten through both marks, then remove the tape.
- Hang on both hangers at once: Lift the frame onto both fasteners together, then check it with a level.
Do's and Don'ts of Sawtooth Hanging
A sawtooth hanger is simple hardware, but a few habits separate a clean hang from a wall full of extra holes.
Do's for a Secure Hang
- Match the hanger to the frame's weight: Check the rating against the actual frame before you hang it, not after. Wooden frame options add real weight, and knowing roughly how solid wood frames compare helps you judge that before you drill.
- Center a single hanger on the top edge: An off-center hanger becomes noticeable once a piece hangs below eye level, especially against a plain wall.
- Pre-drill the wall first: A pilot hole gives a cleaner mark and a more accurate fastener placement than driving straight in.
- Measure the drop carefully: Use the decorator's-tape method for anything with two hangers, so you only make the hole once.
Don'ts to Avoid
- Don't use a light-duty hanger on a heavy frame: For anything beyond a sawtooth's rated weight, brass D-rings and picture wire distribute the load far better.
- Don't skip assessing the wall first: Guessing the type of wall, or grabbing the wrong drill bit, risks cracked plaster or a fastener that never really grips.
- Don't rely on guesswork for placement: Measure at least twice, and don't force a frame level against a floor or ceiling that clearly isn't.
- Don't use adhesive strips as a substitute: They shift with temperature changes and aren't built to hold sawtooth hardware long-term.

4 Additional Tips for a Cleaner Hang
A few extra habits go a long way once you've got the basics down.
- Test the hang before you walk away: Give the frame a gentle tug once it's up to confirm the hanger caught properly, rather than assuming it's secure because it looks straight.
- Add felt pads to the bottom corners: They hold the frame slightly off the wall, prevent any tilt, and protect the wall if it ever gets bumped.
- Keep a rough record of your measurements: A quick note of where each piece sits saves you from redoing the math later, especially once you're planning a gallery wall of several frames at a time.
- Consider a picture rail system for frequent changes: These aluminum rails install once, using screws and wall anchors, then let you reposition pieces on adjustable cables without a new nail hole each time.
A Well-Framed Finish Starts With the Right Hanger
Sawtooth hangers do an unglamorous job well, holding a frame flat, keeping the back tidy, and staying out of sight. Get the weight, the wall, and the placement right, and the hardware itself barely matters once the piece is up. It's a small piece of metal carrying more responsibility than most people ever notice, right up until the day it doesn't.
It's part of why FrameForest frames ship with a mounting kit already attached, featuring sawtooth hangers built for simple, secure wall mounting. That kit comes standard with every frame, at no extra cost, so once you've got the technique down, there's nothing left to buy or figure out before it goes up.
FAQs
How much weight can a sawtooth hanger hold?
A standard sawtooth hanger typically holds up to about 20 lbs (9 kg), while heavy-duty steel versions built for wider moldings can be rated for significantly more [1][2]. Always check the rating on the hanger itself before hanging a heavier piece.
Can I use sawtooth hangers on drywall?
Yes, as long as you either drive into a stud or use a wall anchor rated for the frame's weight. A nail or screw straight into unsupported drywall won't hold much on its own.
What nails or screws should I use for sawtooth hangers?
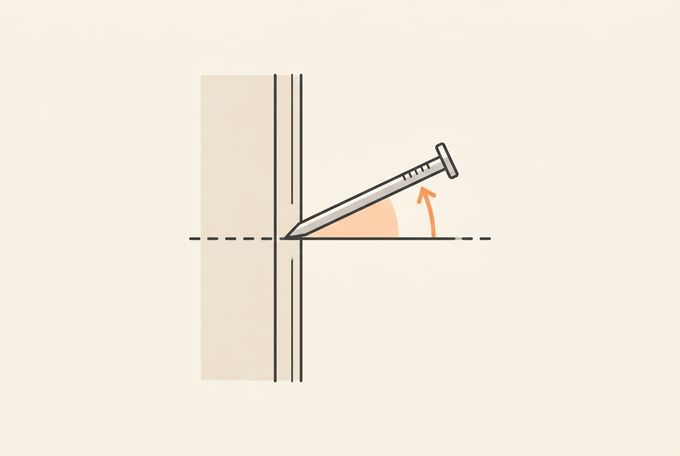
A headed nail works well on solid walls, a pre-drilled wood screw suits studs, and a masonry screw or anchor with a thin masonry bit is right for brick or concrete. Drive the fastener at a slight upward angle so the hanger's teeth grip it securely.
Can sawtooth hangers be used on framed canvas?
Yes, though framed and wrapped canvas pieces are often lighter than a comparable framed photo, since there's no mat or, in the wrapped format, no outer frame at all. That can make a lighter sawtooth hanger a better fit than you'd expect for the size of the piece.
What should I use instead of a sawtooth hanger for a heavy frame?
For anything beyond a sawtooth hanger's rated weight, brass D-rings with picture wire distribute the load more evenly and hold larger or heavier pieces more reliably.
References
Snyder, T. (2026, June 6). How to choose the right hanging hardware. thisoldhouse.com
Jerry's Artarama. (n.d.). OOK Mega Sawtooth picture & frame hangers. jerrysartarama.com